After cleaning the shoes up the other day they went back to their old games of locking as I backed out in the morning again a few days later. So the new Mintex shoes arrived from P'dcks today and I decided to fit them in between rainstorms.
They went on without too much of a hitch (other than I fitted trailing shoes on one side and leading on the other initially) and adjusted up easily. The old shoes were always a PITA to set-up and I think the snail cams were jumping off the pins on the shoes?
With the new shoes I no longer have the need to do a quick short pump on the pedal before a good hard stomp. They are now ready to go on the first press which echoes my thoughts above. The back now locks up good a solid every time!
From now on I will stick with Mintex for Series brake shoes. The cost difference is <£5 an axle ! ;)
01 November 2013
26 October 2013
26 October 2013 - Rear brake mis-behaving
For the third time this week I reversed Trigger out of the drive and the offside rear drum locked with only a dab of brake. The difference in the amount of pedal stroke required to cause it to lock was major. Just a nudge with my toe and I nearly ended up over the rear bulkhead! Rolling back across the drive I could feel the shoes causing a lot of resistance so something wasn't right. Once I drove forward the issue went away.
Looking at the drums today in between wind and rainstorms there was nothing obvious on either rear assembly. All the springs were present, shoes were perpendicular to the rear plate, no fluid leakage, but there was a build up of powdered shoe material on both the drum and shoe. More so on the offside hub. Not the fine powdered stuff that would be expected to blow away but flattened lumps of it.
Now I remember that this time last year I was having issues with a weeping offside hub seal at the rear. Though I managed to get all the EP90 off the shoe could it have made it's way into the material and was causing it to break down? I don't believe I changed them. There's nowt in the blog records...mmm. Anyways these shoes aren't Mintex. Prob ChingChong?
This is the offside leading shoe. Note the surface breaking up at the top edge.

After giving them and the drums a wipe down with some solvent and a rag they were re-assembled and adjusted up so they were just dragging. Took the 109 out for about 30 miles and all seems fine...for now.
I will get a set of quality (probably Mintex) shoes ordered up for the rear next week.
03 October 2013
27 Sept 2013 - Yet another fuel tank!!
Well after the July attempt and cost of trying to reseal the RH tank it managed to spring a leak within a couple of days. I noticed a small drip under the tank almost the size it was before the repair. Stick my hand under the tank and...yep still leaking.
I gave it a few more days just to check it wasn't trapped fuel from the last leak but no it was definitely a leak good and proper!
So what to do? Well at least this leak was very minor and the tank wasn't dropping it's level at any great rate (after 5 weeks the half full tank wasn't empty) and this is diesel/SVO blend not highly flammable petrol?
As four years ago a military tank is still around £200. This is too spendy so I did the same as before and went with the Britpart offering, which is a good copy of the original rear fill underseat type. OK the metal is not as thick but at £70 delivered you can't argue? Rob down the road was selling his ex-Mil FFR and that had a leaky tank so he donated that one so I could use the filler cap assy as before.
Now Rob's tank had leaks in almost the same locations as mine so it was worth a prod to see what I could find. Also Rob had POR15 sealed his tank as well when he rebuilt the 109.
After a combination of heating the solder joints plus a bit of crowbar'ing the support plate came away. The source of the leaks was obvious. The trapped area between the support and the base of the tank had never seen paint and was an ideal trap for 'carp' and water etc.


I guess this corrosion problem will exist in all tanks of this type. Applying POR15 will seal the internal surface....for a time. But if the material that the coating is stuck to is not stable the leaks will re-appear...and it can only get worse? Really what you need to do is immerse the whole tank in POR15 to do it right?....or buy the later two part pressed type from the usual suspects. They might not look 'correct' but they not have these rust traps!?
So with Rob's old tank ready to go to recycling I lopped out the old filler with the trusty 4" chop saw and made a similar hole in the new tank, after lopping the rear filler and vent stub off. As this was a new tank I thought I would try soldering. Last time I had to resort to tack welding with the MIG.
Well the soldering worked. The fresh metal helped and a dose of plumbers flux and the lead/tin solder I had to hand did it's job. This was an old roll that came from SWMBO's late departed Dad's shed. God bless Ken.
 Painted the whole tank with zinc rich primer (as before), then a good coat of exterior black gloss and left it to cure for a week. So, hopefully, this should be jacked into position this weekend. I will stick some underbody wax front and back once it's up and bolted.
I gave it a few more days just to check it wasn't trapped fuel from the last leak but no it was definitely a leak good and proper!
So what to do? Well at least this leak was very minor and the tank wasn't dropping it's level at any great rate (after 5 weeks the half full tank wasn't empty) and this is diesel/SVO blend not highly flammable petrol?
As four years ago a military tank is still around £200. This is too spendy so I did the same as before and went with the Britpart offering, which is a good copy of the original rear fill underseat type. OK the metal is not as thick but at £70 delivered you can't argue? Rob down the road was selling his ex-Mil FFR and that had a leaky tank so he donated that one so I could use the filler cap assy as before.
Now Rob's tank had leaks in almost the same locations as mine so it was worth a prod to see what I could find. Also Rob had POR15 sealed his tank as well when he rebuilt the 109.
After a combination of heating the solder joints plus a bit of crowbar'ing the support plate came away. The source of the leaks was obvious. The trapped area between the support and the base of the tank had never seen paint and was an ideal trap for 'carp' and water etc.


So with Rob's old tank ready to go to recycling I lopped out the old filler with the trusty 4" chop saw and made a similar hole in the new tank, after lopping the rear filler and vent stub off. As this was a new tank I thought I would try soldering. Last time I had to resort to tack welding with the MIG.
Well the soldering worked. The fresh metal helped and a dose of plumbers flux and the lead/tin solder I had to hand did it's job. This was an old roll that came from SWMBO's late departed Dad's shed. God bless Ken.

13 August 2013
12th August 2013 - New starter motor in....Trigger tried to torch himself!
STARTER MOTOR
Over the weekend I managed to fit the new Britpart starter motor...which wasn't straight-forward.
The old one was always a PITA to get in and out between the chassis rail and engine block. It would only 'just' go through, and even then only if you fitted it exactly the right way round. A bit like playing Jenga! The new one wouldn't fit through the access though.
Checking one against the other I found the new ones flange was very slightly bigger on two of the radii plus also had an additional unnecessary lump. I had to remove said lump and reduce each radius by 3mm. then it would go in. Still a PITA though. I probably wasted 2 hours struggling before I realised the motor assembly wasn't 'exactly' the same.
A good comment from someone on the S2 forum was to remove the LHS/nearside (if you drive on the correct side of the road) wing support bolted to the chassis rail/wing. This makes a perfect port to put the starter through. Saves all my swearing?
With the new motor installed it really starts a whole lot easier then the original ever did. Blip the button and Trig's Tdi fires every time...even without the glowplugs.
Did a 10 mile round trip dump run without any issue. Running sweet.
OH....DEAR..........
Monday morning SWMBO gave me the task of collecting a wendy house for our daughter on my way home. So Trig's had a job for the day. Both tanks were full so a 80 mile round trip including the office would not be a problem.
10 minutes into the trip as I joined the dual carriageway the engine cut out and the dash lights went dead. Luckily this happened as I reached a layby otherwise I would have been blocking lane 1 of the A303! As I stopped smoke started to waft from under the bonnet in the area of the starter motor.
I grabbed the fire extinguisher and carefully lifted the bonnet. Yep, definitely smoke ;) I jumped back in the cab and isolated the battery (useful to have a switch?).
As the smoke cleared I could see the reason for the engine cut-out and the smoke. The main supply cable to the truck electrics and jumped out of position and had welded itself to the exhaust manifold!
I decided at this point that maybe todays long trip wasn't really a go'er. I bent the now exposed cable away from the manifold into free air and tried the starter. Started fine. I just hope the dual batteries haven't been damaged by the huge current flow?
Drove back without issue (5 miles) and dropped the LR off at home. I isolated the battery and took another car from the fleet to make the office run.
Last night I stripped out the offending wiring. The 25mm cable from the starter to the starter button (supplies all the truck +12v bar the starter motor - melted and was the source of the smoke); Battery ground connection 16mm? - this has also melted; battery isolation switch - FUBAR'd.
Here's the state of the 25mm supply to the starter!

What this does show is that :-
1. You should tie the cables down firmly to avoid this (they have been fine for +2 years....but)
2. It pays big dividens to have a battery iso switch!
The 25mm cable from the battery to the starter survived so that can be reused and I have ordered the same CSA to replace the damaged cables. This and a new batt isolator came to <£20. It could have been A LOT more expensive?!
05 August 2013
3rd August - Starter motor gone for a burden!
Saturday I had planned to do yet another dump run but my prodding with the starter button only caused the starter to spin and wirr with no cranking over from the engine.
About 12 months ago I previously replaced the solenoid assembly on the starter but this seemed like something else?
Starter was stripped out and stuck in a car battery with a pair of 16mm jump leads. Solenoid/coil throws the starter gear forward but the starter wasn't spinning. I put that down to me dropping the cable too soon as they were so damn hot! ;)
Anyway it seemed good so I lubed up the starter gear assy with coppaslip and refitted it. Same problem.
The remaining main part of the Valeo starter had originally come with the engine donating Disco. This had 99k miles on the clock. The starter is stamped 1991 so I guess it has had a good innings. Probably the internal clutch has failed? A new one (Britpart offering as 'apparently' they are OK - cheers Lynall) is now on order and should be here the middle of this week.
Thinking back the starter has been showing some intermittant issues for a while. The odd buzz which then required a second press of the starter button to kick it over.
Let's see how the new one fairs?
22 July 2013
20 July 2013 - Fuel line plugged/tank back in
As the POR coating was being left to cure for a few days I still needed to do another dump run or two so as the LH tank was running fine with dieso last weekend I thought there wouldn't be any issues. How wrong was I?
Heading out to the refuse tip on Saturday morning I approached a 1 in 3 hill out of the neighbouring village and then started to lose power on the hill. Then the engine cut out. Oh dear. Fuel starvation. My sudden stop did seem to miff the guy who was up my butt up the hill but there was nowt I could do.
I managed to get the engine running again and made it to the dump and home again (7 miles) without any further issues.
Back home I started to strip the system down. First the fuel filter had not been changed for a while so that was swapped. The old one had a foam shroud over it for some additional insulation and once removed I could see that the filter was not tight and had been leaking slightly. So I cleaned everything up and replaced with new O-rings.

Once the engine was fired up it normally takes 5 mins to clear the air out of the system and the fresh filter. Not this time. After 10 mins it was running better but some air continued to appear in the feed lines. Engine was shut down and I pulled the feed tube out of the tank. Trying to blow down it seemed a bit 'restricted'. This is what I found in the right angled section at the outlet.

So this was the reason for the Tdi struggling before the drain down then the dieso in throw in there helped to flush even more to the point of the blockage?
The filler cap was also blocked pretty much. In the end I soaked it first in kerosene and then cleaning solvent. Also torched it in betweeen to see if that would burn the gunge out. Eventually after a second soak in solvent the vents cleared.


From now on I will restrict the the LH tank to 75% WVO. This will limit the polymerisation and also the varnish built up.
RH TANK BACK IN
Once the LH tank feed problems were fixed I could turn my attentions back to the newly lined RH tank.
Originally this wasn't due to be refitted until the following day but I was due to a local car show the next morning and as the weather had been a pretty steady 27-30 Deg.C since the coating was applied it was now rock solid.
Tank raised in position via a car scissor jack and a few lumps of wood and filled with 20 litres of pure dieso. No sign of any leakage after a few hours so....touch wood?
Here's the interior coating before the fuel was chucked it.

Heading out to the refuse tip on Saturday morning I approached a 1 in 3 hill out of the neighbouring village and then started to lose power on the hill. Then the engine cut out. Oh dear. Fuel starvation. My sudden stop did seem to miff the guy who was up my butt up the hill but there was nowt I could do.
I managed to get the engine running again and made it to the dump and home again (7 miles) without any further issues.
Back home I started to strip the system down. First the fuel filter had not been changed for a while so that was swapped. The old one had a foam shroud over it for some additional insulation and once removed I could see that the filter was not tight and had been leaking slightly. So I cleaned everything up and replaced with new O-rings.

Gunge in the filter
Once the engine was fired up it normally takes 5 mins to clear the air out of the system and the fresh filter. Not this time. After 10 mins it was running better but some air continued to appear in the feed lines. Engine was shut down and I pulled the feed tube out of the tank. Trying to blow down it seemed a bit 'restricted'. This is what I found in the right angled section at the outlet.

Well that's blocked then!!
So this was the reason for the Tdi struggling before the drain down then the dieso in throw in there helped to flush even more to the point of the blockage?
The filler cap was also blocked pretty much. In the end I soaked it first in kerosene and then cleaning solvent. Also torched it in betweeen to see if that would burn the gunge out. Eventually after a second soak in solvent the vents cleared.

Cap started like this. Varnish and polymerisation

That'll clean the gunge out?
From now on I will restrict the the LH tank to 75% WVO. This will limit the polymerisation and also the varnish built up.
RH TANK BACK IN
Once the LH tank feed problems were fixed I could turn my attentions back to the newly lined RH tank.
Originally this wasn't due to be refitted until the following day but I was due to a local car show the next morning and as the weather had been a pretty steady 27-30 Deg.C since the coating was applied it was now rock solid.
Tank raised in position via a car scissor jack and a few lumps of wood and filled with 20 litres of pure dieso. No sign of any leakage after a few hours so....touch wood?
Here's the interior coating before the fuel was chucked it.

17 July 2013
17 July 2013 - POR15 in da tank!
Well I arrived home to find the pint of POR15 tank seal from Frosts sitting on the doorstep. So I thought I had better get that poured in. Cure time is around 96 hours so the earlier I get that coated up the better?
The first FUBAR was to pour 500 ml of epoxy coating into the tank through the filler port AND LEAVE THE DAMN DRAIN PLUG OFF! Luckily the funnel spout I placed through the filler port is not over the drain but I still lost around 50-60 ml which ran over the garden table and then onto the patio tiles. Well at least they will never leak?
The remaining coating was mainly left to settle on the dubious rear wall of the tank and the joint around it. I never had to drain any excess off. What with the premature 'draining' at the start the entire tin was used to re-coat the interior of the tank over the existing coating. Now to wait for it to set, which with the thickness I have laid up will be around Sunday I should think!?
After 4 hours the coating seems to have spread out evenly so it appears that my cleaning regime with Tescos budget bio auto washing powder may have worked? After all I have coated it once before so the full POR15 'kit' would have been overkill.

13 July 2013
13 July 2013 - Houston. We have a definite leak!!
RH FUEL TANK
After scraping the paint and coatings off the bottom of the tank the other day I took a further closer look last night. There is a definite leak. Not much but a weep around the offside lower seal all the same, so the tank has to come out.
The tank was drained down and I cracked all the screws this morning then dropped the tank (screws had only been on three years so no issues with them). I also realised this was the 'Bomag tank'. A std rear fill that I had modded to a military'ish spec to do the job. Not that that is an issue.
Firstly pressure washed after a spray of kerosene and then a stiff scrub with a brush. As per the base of the tank the paint peeled off some areas very easily. Poor prep on my part?

The inside looked in mint condition bar the grime residue from the WVO/dieso. To degrease and clean out the interior I added two bucket loads of hot water with bio washing detergent to cut through the grime then forced my hand through the filler and gave it another scrub followed by a rinse out with the pressure washer. Then repeat the whole thing again with more hot water/bio/rinse.
Looking at the internals after it had dried out there was nothing obvious that's causing the leak but the coating does look thin especially on the rear wall. This is a common point of breakthrough anyway. The fuel also seems to be coming from behind the lower section of the support plate at the rear so it is probably leaking from a pinhole, passing between the plates then leaking at the lowest point?
After the addition of the hot water etc. the paint coating came off easily and in the end around 50% of the old stuff came off. These areas were clean then sanded back with coarse paper to bare metal ready for some quality zinc primer. Two coats of Smith & Allens 'galvafroid' equivalent later it looked like this. Exterior grade black gloss to follow plus black waxoyl underbody seal on the four vertical sides before install.

The original interior coating was POR15 Tank Seal and last time I used a 950 ml can shared between both tanks. I will stay with the same stuff but I don't really need half a liter...but I will get it anyway as 250 ml is only £7 less! Still £25 a pop!? This will be here next week.
As Trig's was temporarily down one tank I needed to get him running for the weekend. As the RH tank had already been drained of fuel (around 80% dieso) this was stuck in the LH tank after draining most of that down. I don't want to start the engine cold on high concentration of WVO (even if the weather here is 27-30 Deg.C at the moment).
I took Trig's for a quick dump run and he ran fine. This was the tank that seemed to be suffering fuel starvation on high WVO levels. So it must be a viscosity problem restricting the flow when this tank is used for high concentrations of WVO?
After scraping the paint and coatings off the bottom of the tank the other day I took a further closer look last night. There is a definite leak. Not much but a weep around the offside lower seal all the same, so the tank has to come out.
The tank was drained down and I cracked all the screws this morning then dropped the tank (screws had only been on three years so no issues with them). I also realised this was the 'Bomag tank'. A std rear fill that I had modded to a military'ish spec to do the job. Not that that is an issue.
Firstly pressure washed after a spray of kerosene and then a stiff scrub with a brush. As per the base of the tank the paint peeled off some areas very easily. Poor prep on my part?

The inside looked in mint condition bar the grime residue from the WVO/dieso. To degrease and clean out the interior I added two bucket loads of hot water with bio washing detergent to cut through the grime then forced my hand through the filler and gave it another scrub followed by a rinse out with the pressure washer. Then repeat the whole thing again with more hot water/bio/rinse.
Looking at the internals after it had dried out there was nothing obvious that's causing the leak but the coating does look thin especially on the rear wall. This is a common point of breakthrough anyway. The fuel also seems to be coming from behind the lower section of the support plate at the rear so it is probably leaking from a pinhole, passing between the plates then leaking at the lowest point?
After the addition of the hot water etc. the paint coating came off easily and in the end around 50% of the old stuff came off. These areas were clean then sanded back with coarse paper to bare metal ready for some quality zinc primer. Two coats of Smith & Allens 'galvafroid' equivalent later it looked like this. Exterior grade black gloss to follow plus black waxoyl underbody seal on the four vertical sides before install.

The original interior coating was POR15 Tank Seal and last time I used a 950 ml can shared between both tanks. I will stay with the same stuff but I don't really need half a liter...but I will get it anyway as 250 ml is only £7 less! Still £25 a pop!? This will be here next week.
-----------------------------
As Trig's was temporarily down one tank I needed to get him running for the weekend. As the RH tank had already been drained of fuel (around 80% dieso) this was stuck in the LH tank after draining most of that down. I don't want to start the engine cold on high concentration of WVO (even if the weather here is 27-30 Deg.C at the moment).
I took Trig's for a quick dump run and he ran fine. This was the tank that seemed to be suffering fuel starvation on high WVO levels. So it must be a viscosity problem restricting the flow when this tank is used for high concentrations of WVO?
11 July 2013
10th July 2013 - Bits falling off.......
Over the past three days Trig's has driven around 250 miles trudging back and forth to the office picking up a French colleague from his hotel on the way (he has a 'thing' about Land Rovers so did not want to disappoint). A far more thorough shakedown run that he has ever been subject to before. A few faults occurred on the way home yesterday....but Trigs trudged on regardless.
WOULD NOT START
Pulled up at the hotel and when I went to restart with a hot engine the starter would wind over but the engine would not kick. I had been running on SVO for a few miles so I suspected a fuel blockage.
Popped the bonnet and, yes that was the case. Switched back to diesel on the RH tank and after a few turns he started and ran. I need to investigate the fuel issue on the LH side (see below).
BONNET CATCH
When I went to open the bonnet one of the military catches broke. The central pin pulled through the retaining cap in the end so it was left flapping on the bonnet. I wrapped a bungie around it for the 30 mile run home.
When I returned home I put a cold chisel/vice/MIG welder to good use and fixed it. They are not designed to be 'servicable' Ha ha!
RH FUEL TANK
Looking under the LR before I headed home I noticed a small drip falling from the RH tank. Checking the 2p sized damp patch I found it was definitely diesel. There was a similar damp area under the mud on the tank. It is a minor leak but does look like another issue.
The twin fuel tanks were the first items to be overhauled when I started stripping the 109 down, back in 2009. Each tank was chem washed and epoxied inside and out with tank seal. I am surprised if that has failed but I need to investigate further.

LH TANK FUEL SUPPLY
The LH tank runs around 75% SVO (maybe more) and was working fine early this week. Once the engine has done 5-6 miles and is up to temp I switch over.
One morning was a little colder (not that cold as I have had the tilt up and the door tops off) and I noticed that it was suffering fuel starvation under heavy load. Flick to the RH tank and it ran fine.
So I have a few possible causes:-
Another issue to investigate?
WOULD NOT START
Pulled up at the hotel and when I went to restart with a hot engine the starter would wind over but the engine would not kick. I had been running on SVO for a few miles so I suspected a fuel blockage.
Popped the bonnet and, yes that was the case. Switched back to diesel on the RH tank and after a few turns he started and ran. I need to investigate the fuel issue on the LH side (see below).
BONNET CATCH
When I went to open the bonnet one of the military catches broke. The central pin pulled through the retaining cap in the end so it was left flapping on the bonnet. I wrapped a bungie around it for the 30 mile run home.
When I returned home I put a cold chisel/vice/MIG welder to good use and fixed it. They are not designed to be 'servicable' Ha ha!
RH FUEL TANK
Looking under the LR before I headed home I noticed a small drip falling from the RH tank. Checking the 2p sized damp patch I found it was definitely diesel. There was a similar damp area under the mud on the tank. It is a minor leak but does look like another issue.
The twin fuel tanks were the first items to be overhauled when I started stripping the 109 down, back in 2009. Each tank was chem washed and epoxied inside and out with tank seal. I am surprised if that has failed but I need to investigate further.
Pic from 2009
LH TANK FUEL SUPPLY
The LH tank runs around 75% SVO (maybe more) and was working fine early this week. Once the engine has done 5-6 miles and is up to temp I switch over.
One morning was a little colder (not that cold as I have had the tilt up and the door tops off) and I noticed that it was suffering fuel starvation under heavy load. Flick to the RH tank and it ran fine.
So I have a few possible causes:-
- The fuel line is 6mm ID and uninsulated. Maybe change to a more insulating type of std fuel hose?
- I am relying on only the mech lift pump on the Tdi to pull the fuel over. Probably asking too much?
- Thin the SVO a bit more with a bit more unleaded?
- Tank CAV filter blockage. Doubtful as this was changed a few months back.
- Vent blocked. No. Vent taken apart and thoroughly cleaned this week.
Another issue to investigate?
29 June 2013
28th June - Fixed the Tex Magna and steering lock tweaked
INDICATOR FIX
On the Series 2 forum and in the latest 'Built to last' the forum member Xenocide came up with the ingenious idea of using a sink plug to replace the original self cancelling rubber wheel on the Tex-Magna indicator stalk on the S2. Well mine like most had perished and the thought that I could fix this for pence caught my attention.
Original forum thread here ---> http://www.series2club.co.uk/forum/forum/index.php/topic,63762.msg589971.html#msg589971
Well I beat the original cost and picked up a new sink plug for 22p! Though it was white but if it works what do I care?


Read the forum link for the whole method but it works..and works well. I cannot believe I have a 47 year old truck with self cancelling indicators, very RnR?
STEERING LOCK
Shuffling the 109 around in the confines of the local recycling center this week provoked a comment from one ex-squaddy of 60's vintage that he didn't remember the lock being that bad. Driving back home I had a thought.
I set the steering lock stops for the original 7.50 Goodyear Wranglers. I now have 7.50 Michelin XZL which are narrower. Having a shufty I realised I could crank another 1/4" off each stop which improves the barge like manouvering of the 109 a little...but not a lot. Every little improvement is welcome.
25 June 2013
25th June 2013 - New MOT!!
Trig's rolled into the local garage this morning at 1030. I rolled into Weatherspoons for a cardiac fry-up and a coffee and one hour later (they had free WiFi) I return to find he had passed the MOT!
No advisories at all...bar the fact I forgot to remove the baby seat. So another year for £45.
...and did I say zero advisories...I can't get my head around that one?
BONNET BUMPY BITS
So on a high note I thought I would have another look at the bonnet rattle induced by the cold Tdi at start up and idle.
A few months back we bought a new washing machine and the transit bolts came fitted with a couple of rubber doughnuts. 'These could be useful' I thought to myself. So they were put to one side for later usefulness.
Roll on today and with the assistance of a couple of bits of 8mm stud bar, a few nylocs and a bit of drilling I fitted them thus.

Seems to work ;)
No advisories at all...bar the fact I forgot to remove the baby seat. So another year for £45.
...and did I say zero advisories...I can't get my head around that one?
BONNET BUMPY BITS
So on a high note I thought I would have another look at the bonnet rattle induced by the cold Tdi at start up and idle.
A few months back we bought a new washing machine and the transit bolts came fitted with a couple of rubber doughnuts. 'These could be useful' I thought to myself. So they were put to one side for later usefulness.
Roll on today and with the assistance of a couple of bits of 8mm stud bar, a few nylocs and a bit of drilling I fitted them thus.
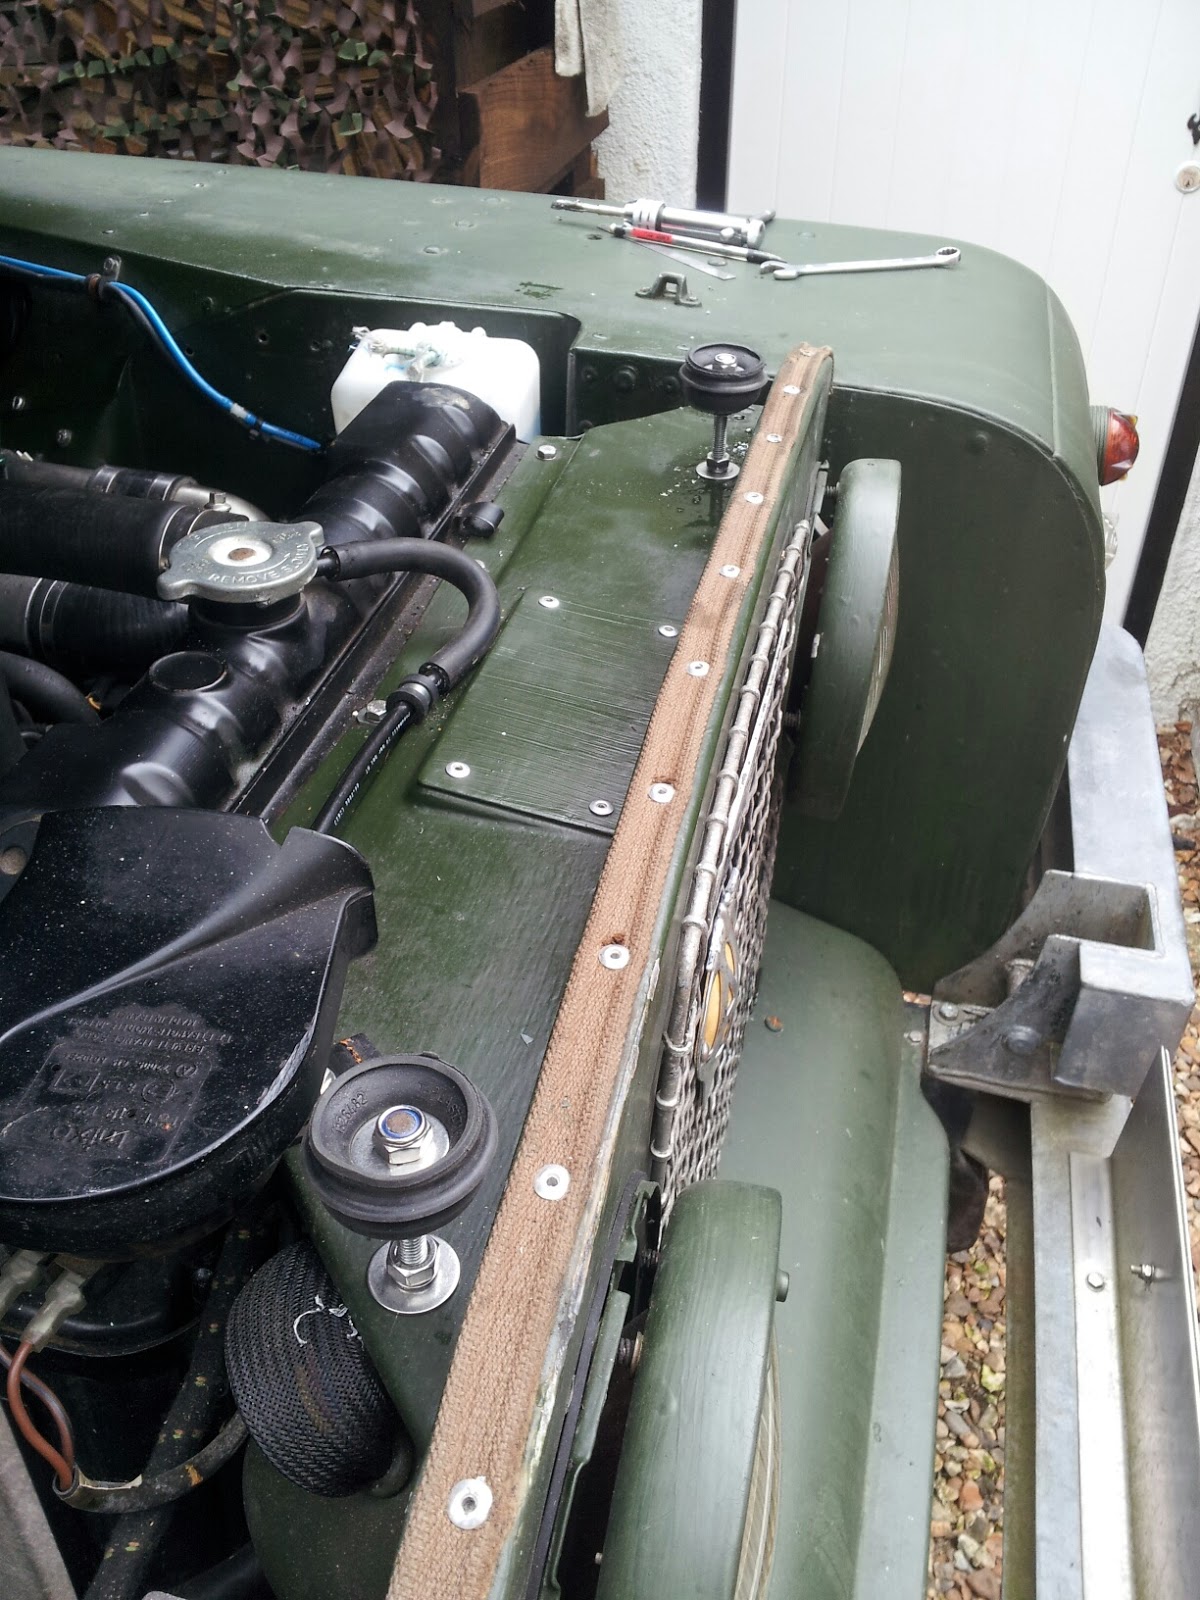
Seems to work ;)
20 June 2013
14th June 2013 - Sump back on and off we go!
SUMP BACK ON
Well all the expected parts arrived so we were ready to get the whole lot back together. Sump sealed with RTV and left overnight to cure. In the meantime I thought I would check over the tappet clearances again. Last time I set them to dead 8 thou (0.2mm). That is the Haynes specified clearance but I decided to reset to 10 thou. A little bit more play, but better a little bigger than too tight?
Rocker went on with a new gasket and the side mounted vent filter had a smear of black RTV before re-assy.
The following morning SWMBO had me scheduled to haul a load of 12ft 4" dia. posts from the local farmers merchant so Trig's had to be fit. 6 'or so' litres of 10/40 went in the hole and he fired and sounded fine. After the 15 mile round trip a quick check showed the sump to be around 1 litre overfull. Well I did say 6 or so and I guess it settled a bit from when I previously measured the level?
After starting to drain a bit out I decided to dump the lot and refill. The first fill of oil at least gave the lot a good flush through? No harm other than the waste of oil and cleaner internals are never a bad thing?
Definitely running better (fixing the exhaust helped?) and I don't appear to have any more oil leaks so touch wood......
Next challenge is to get through the annual MOT next week?
10 June 2013
9th June 2013 - Loose steering/loose exhaust/tappet adjust/sump off
Firstly, and I seem to remember saying this many times before, where does time go? I just logged back into the blog only to find I have posted b'all since the end of last year? I know time is tight with work/children etc. but I have done a bunch.
So to summarise the past few months of fettling.
GLOW PLUG RELAY etc.
The last one I fitted was never going to be up to the task long term so I ordered a 75A model and an inline 80A fuse. The 'weaker' model was dumped and this lot cobbled in.
I also looked at the glow plug on No.1 cylinder that was refused to come out last year. Well back then it still worked but now that one has gone TU too. So I tried soaking the exposed threads GT85 over a couple of weeks. Then heating it up with a blow torch to break the bond to no avail. It started to rotate with carefully applied force then sheared.
That one is now definitely staying in there until I find a reason the head has to come off! So only three plugs but far, far better than none!
FUEL SYSTEM MODDED AGAIN
When the fuel selection relays and plumbing went in I initially went with a heat exchanger on the common feed to the injection and lift pump. After reading peoples concerns regarding heating pure diesel (RH tank) I modded the plumbing so just the LH tank which always contained higher concentrations of SVO was heated.
Thinking about this again recently. The coolant on the engine is thermostatically controlled to about 80 Deg. C. The heat ex is never going to be 100% efficient so therefore I very much doubt the fuel will get as high as that level - even allowing for possible overheat conditions? And what temperature could the diesel tank get to on a hot day anyway (location dependent)?
So as even the RH tank now runs 30% SVO to 70% dieso I modded the whole lot back again so everything is now going through the HE. As a bonus the air that was getting into the RH tank feed has also gone away and eveything now runs fine on both tanks!
LOOSE STEERING
While buried under the bonnet one afternoon I noticed a couple of the bolts securing the steering box to the bulkhead securing plate were loose. Actually all of them were very loose.
Tightened the lot up which has improved the steering no end ;)
This weekend I started on a bunch of jobs in advance of Trig's annual MOT that's due next month.
LOOSE EXHAUST
I took Trigger for a 70 mile round trip to work last week and on the homeward leg I heard a ping and a rattle as I was driving through town. It sounded like a bolt to me but I carried on regardless and everything seemed fine.
Roll on that evening and while doing a quick check I found that the side exit silencer box was hanging at a jaunty angle. Not the sort of jaunty angle it should be hanging at either.
Checking the pipework one of the bolts on one flange was completely missing and the other two were loose. Now fixed and secondary nyloks added to each screw. I should notice a difference once Trig's is fired up again.
SUMP OFF...
As the weather was good I thought I would whip the sump off for a general check on the condition of the engine.
When I bought the Disco that donated this engine it had 99k on the clock and the engine seemed good and strong. But I didn't know how it had been maintained so it was more a gut instinct than anything else. Since then I have been running SVO and the general 'man in the pub' on the forums believes the sump will now contain 'killer jelly' due to SVO passing the rings and other such horrors. So what better than a close up inspection?
I was changing the oil anyway and cleaning this out should keep the oil cleaner for longer. Sump came off without any dramas and was fine internally. A quick wipe with some kerosene and the internals were as good as new. This will go back on next weekend.
While the sump was off the oil pick-up filter was also given a rinse.


So to summarise the past few months of fettling.
GLOW PLUG RELAY etc.
The last one I fitted was never going to be up to the task long term so I ordered a 75A model and an inline 80A fuse. The 'weaker' model was dumped and this lot cobbled in.
I also looked at the glow plug on No.1 cylinder that was refused to come out last year. Well back then it still worked but now that one has gone TU too. So I tried soaking the exposed threads GT85 over a couple of weeks. Then heating it up with a blow torch to break the bond to no avail. It started to rotate with carefully applied force then sheared.
That one is now definitely staying in there until I find a reason the head has to come off! So only three plugs but far, far better than none!
FUEL SYSTEM MODDED AGAIN
When the fuel selection relays and plumbing went in I initially went with a heat exchanger on the common feed to the injection and lift pump. After reading peoples concerns regarding heating pure diesel (RH tank) I modded the plumbing so just the LH tank which always contained higher concentrations of SVO was heated.
Thinking about this again recently. The coolant on the engine is thermostatically controlled to about 80 Deg. C. The heat ex is never going to be 100% efficient so therefore I very much doubt the fuel will get as high as that level - even allowing for possible overheat conditions? And what temperature could the diesel tank get to on a hot day anyway (location dependent)?
So as even the RH tank now runs 30% SVO to 70% dieso I modded the whole lot back again so everything is now going through the HE. As a bonus the air that was getting into the RH tank feed has also gone away and eveything now runs fine on both tanks!
LOOSE STEERING
While buried under the bonnet one afternoon I noticed a couple of the bolts securing the steering box to the bulkhead securing plate were loose. Actually all of them were very loose.
Tightened the lot up which has improved the steering no end ;)
___________________
This weekend I started on a bunch of jobs in advance of Trig's annual MOT that's due next month.
LOOSE EXHAUST
I took Trigger for a 70 mile round trip to work last week and on the homeward leg I heard a ping and a rattle as I was driving through town. It sounded like a bolt to me but I carried on regardless and everything seemed fine.
Roll on that evening and while doing a quick check I found that the side exit silencer box was hanging at a jaunty angle. Not the sort of jaunty angle it should be hanging at either.
Checking the pipework one of the bolts on one flange was completely missing and the other two were loose. Now fixed and secondary nyloks added to each screw. I should notice a difference once Trig's is fired up again.
SUMP OFF...
As the weather was good I thought I would whip the sump off for a general check on the condition of the engine.
When I bought the Disco that donated this engine it had 99k on the clock and the engine seemed good and strong. But I didn't know how it had been maintained so it was more a gut instinct than anything else. Since then I have been running SVO and the general 'man in the pub' on the forums believes the sump will now contain 'killer jelly' due to SVO passing the rings and other such horrors. So what better than a close up inspection?
I was changing the oil anyway and cleaning this out should keep the oil cleaner for longer. Sump came off without any dramas and was fine internally. A quick wipe with some kerosene and the internals were as good as new. This will go back on next weekend.
While the sump was off the oil pick-up filter was also given a rinse.

TAPPET ADJUST
The rocker cover vent had been leaking around the gasket and side vent filter so that all came off for a clean. While it was dismantled I ran over the tappet clearances as they hadn't been checked for 2 years since the engine went in.
They were out but only by a few thou.
____________________
So next weekend the engine should be back together. RTV for the sump, new oil filters and oil and a rocker gasket should be with me by Friday. Oil this time is from Smith and Allan who I have used before for the boingy TD5 lube. Their semi syn 10/40W was £56/20 litres delivered!
Over the past few weeks Trigger has been used to get the dogs out on Salisbury Plain, haul horse stuff about and attend a couple of shows. The last one being the Codford Vintage and Nostalia show last week. Though he wasn't on the Series 2 Club stand he did make it to the vintage parking area on Sunday. Sun was out so tilt was up and door tops off!!

Subscribe to:
Posts (Atom)