13 September 2010

12th September - Brakes 'better'/wheels back on

HOOD
Brushed on the Fabsil over the entire hood in situ on the 109. I just released all around the base of the hood and masked off the body work and screen with newspaper and sheets over the doors.

Originally i bought 2.5 litres and the manufacturers quote 6m sq coverage per litre. Aaaah not on a canvas hood you don't. Neighbour gave me a further litre left from his TVR hood which I managed to eek out to finish the job. Ideally a second application would be best but will have to wait for few years.

Rained next day and no water made it through so must be doing the job?


BRAKES
In a rush I managed to get the two front brake plates rebuilt with TWF/Girling pistons and new cam adjusters. To actually get these bled through Rob ('Minivin') and myself I placed the back plates on a stool alongside the axle with the drums dropped over the backplates and the adjusters wound out. This seemed to do the job!

The plates were refitted and the hubs reassembled. The drivers side hub was a problem though. Whatever we did the drum is dragging on the shoe. Both the drum and shoes are new so all at their max dims so I hope that this is the problem and a bit of use will ease it up a bit. Time will tell after driving back and forth across the yard.

Now I could move the 109 away from the front of the house so the real estate agents could take pics of the house the following morning!


WIRING
Rob refitted the military headlights (I couldn't remember how they went together) and the 109 now looks like 'Chitty Chitty bang Bang' so SWMBO tells me ;)

The instrument panels were dragged out of the box they had been residing in for the past 18 months and were stripped and refurbed. The main central panel had to have the left hand temperature/oil pressure/fuel unit dumped due to corrosion and was swapped for a late 2A one. The other benefits were the 'new' instruments were now electric and not rusty/broken/mechanical which suits the Tdi better anyway.

Even fitted a 52mm boost gauge to replace the now redundant oil pressure gauge. Not really a necessity but fills a hole?

Central panel & gauges before...

....Central panel after

I dragged out the grubby old wiring loom and now see a few additional problems with this despite the entire loom being only approx. 9 years old......

a) The PO had a bit of an electrical short-circuit and some of the large central cables in the instrument loom are melted. These need to be stripped out and repaired
b) Not all colours correspond with any wiring diagrams I have (though I have to admit these are all Series 3)
c) It's a nightmare working out where everything goes to and a suitable routing.

So...as mentioned in previous posts I have decided that I will keep the loom for spare wire sections and order a new Autosparks loom which is as close to the to what I need as possible. I can then do the few odd mods as required - though shouldn't be much (heated screen/twin tank senders/reverse light/alternator/single wiper motor not twin...). £200 order now placed.

In the meantime I have fitted a good solid braided ground bond from the rear chassis (brass bolt) up to the underside of the rear tub and terminated all the lighting grounds to there. Same for the rad panel ground point for the headlights. Wiring from the fuel senders to the changeover switches to be finished this week.


Aside from all the above I have realised that I have lost one wheel nut (somewhere in the gravel) and need one more red glass brake light lens. Dropped my brand new onto the concrete floor the other week and now have to resort to an old chipped one :(

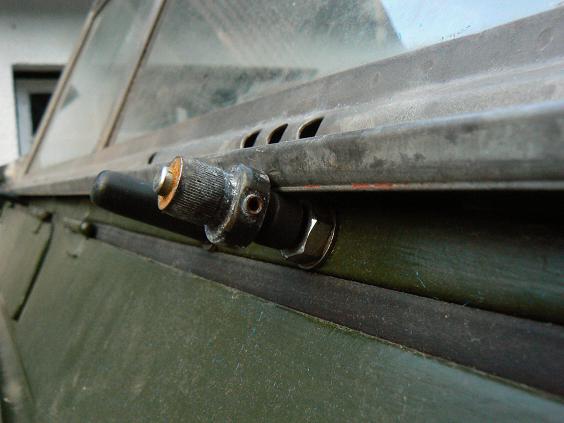
Oh, and the fuel return tap cork internal gasket has now been fixed! Old one was totally shot and appeared to have been feeding return fuel to whichever tank it fancied. Sorted now though.

31 August 2010

30th August - Hood now assembled...and more!

OK. Vast amount now bolted on and I am sorry nothing has been posted for a while but for some reason this Blogspot was not playing ball with my access ID. Bl**dy comps eh?

HOOD
I had decided to avoid arranging for the hood to be washed and reproofed due to the fear of shrinkage. Alternatively I will wash down and proof in situ. Safer that way. Ordered 2.5 litres of Fabsil tent proofer via E*ay for £20 delivered. Should be here this week. and as I am actually working from the office for the next couple of weeks I can get this done.... by chance the weather looks good too!

All the assorted tilt frame bits and bobs arrived from LR Series and Trakkers/Exmoor Trim so now the whole frame can be clamped in position once.......

WINDSCREEN
....the windscreen was in place! This turned out to be more of an problem due to setting the screen so the door gaps were good. We managed it in the end though...or at least the best it is ever going to be anyway? One piece Defender door seals fitted to try and prevent some of the inevitable drafts. The odd frame gap filled with grey/silver RTV ;)

Now I mentioned in previously a few posts back that the clearance from the screen base edge to the wiper shafts was close. Well this is the same screen and early IIA bulkhead that a PO had modded to fit a later single motor wiper drive instead of the original twin seperate screen mounted motors so I thought I must be going nuts? Anyway after adjusting everything up, there is just enough clearance so everything will still work. I will post a pic when it is light enough for me to get one.

DOOR TOPS
I gave these a quick once over with the orbital sander followed by two coats of DBG enamel. Then a single coat of brushed Containergard was applied once they were fitted in position along with injected cavity wax inside the bottom rail. During the prep I also bored out the drain ports to let any moisture out after all that's where the rust seems to get deep seated? One of the tops seems a lot older than the other but both are the late IIA/S3 type with the sliding window lock and in good con.

Here we go.....


DINITROL
Well I found out why I only managed to get through one litre of cavity wax the other week. I had set the Dinitrol gun head wrong. Tweaked it this weekend to treat the door tops and now it goes great guns. After doing the doors the sun came out and the heat caused streams of melted wax to drip out of the doors and the now re-injected bulkhead :)

Only point of note. The Dinitrol gun has a pressure relief port on the top to vent excess pressure if the outlet port becomes blocked. Mmmm. I accidentally bent the outlet pipe when trying to access a difficult piece of bulkhead....then found this out - wax shot up 15ft and landed both inside and outside the hood and also sprayed around the interior! Shoot! At least those spots should avoid rust and leakage eh. Duuuugh.

INTERIOR
A few bits are now painted and re-installed. Battery is now fitted in place with the correct claps, brackets etc. and there is room for another matching batt behind the current one. So may split charge later.

Floors plates and seat box lids now cleaned up and treated to two coats of DBG and are ready to go back in. Trans tunnel cover treated likewise and is now back in place.


Next job (along with hood proofing) will now be the front brakes.

I have been trying to get these to bleed properly but have the usual 109 twin piston issues so I have decided to take the back plates off and raise the vent above the rest of the brake system. Doable. I just need to take a few things apart ;) So as I will be doing that I might as well do the job properly?

Back in the early days I replaced one piston which had failed seals and just fitted new shoes and drums. Looking at both hubs I have two 'monkey' cast (steel?) pistons on one side and one pattern alloy on the other mated with one Girling. I have decided to dump the lot and fit new 4x Girling on the front axle, plus new adjusters! Might as well?

12 August 2010

10th August - Windscreen glass fitted

WINDSCREEN
Parts have now arrived so time to build up the screen.

Parts required:-
  • 1x 150ml small pot of Dum Dum
  • Frame sealant/silicone RTV or more dum dum
  • 6x 1 metre lengths of glass glazing strip
  • Solvent and rags for cleaning
Screen frame was cleaned up last weekend so that only left dusting and wiping down the area that the dum dum is going to seal the glass.
Using a section of the old glass the dum dum was rolled to form a sausage length of 1/4" diameter suitable for each of the four sides of the frame. 'Sausage' laid at the edge of the frame so that when the glass was fitted the excess dum dum squeezes out and fills the void. Pic below shows the first pane of glass dropped in and centered in the frame - then carefully pressed down to 'squidge' the dum dum out of the frame edge.


Next the void between the edge of the glass was filled with frame sealant. You could use Dum Dum if you have enough or silicone RTV. It's your choice but I had a tube of 'natural' frame sealant to hand so used that.


Rubber glazing strip then cut to length and placed around the edge of the glazed area. It needed 6x 1 meter lengths to do the job. Trim then refitted which should hold the glass in tight if you have applied enough Dum Dum. Trim had already been degreased etc. Pic shows the center strip of rubber fitted and the completed strip above.


The same process was carried out for the drivers side (heated) glass. The only difference being the cable routings out of the base of the frame (pics below). Once the complete a craft knife was run around the front side of the screen around the edge of the glazing. The excess dum dum could then be dumped or saved. This will now be left for a few days to cure.


My solution to the cabling connection to the heated screen element was to file out a small notch at either end of the bottom clamp strip. The rubber protects it and one end can then be grounded to the frame and the more central one run through a grommet into the dash void behind the instruments.


Obviously the glass will get a good clean and buff before fitting once then sealant has had time to cure ;)

09 August 2010

8th August - Windscreen dismantled

WINDSCREEN
Well not a great deal happened this weekend due to personal committments but after the paint was removed now it was time for the glass to be removed in prep for the heated glass to be dropped in.

One item noted before the screen was removed. If you see the pic below the bottom of the screen is in contact with both the wiper shaft and washer jet. At that time no seal was fitted between the screen and bulkhead but as far as I can see once it is in there it will be worse than it is now? I have a seal on order (FAJ100020) which should get here this week so then we can see how it looks with the spare windscreen on there? There is no difference from as the 109 was when I stripped it (bar the washers) so.....


Removing the glass was straightforward with the screen supported across two tressels. None of the self tappers stuck and the aluminium sealing strips came out without any problems. After 15 mins it looked like this.


Along with the bulkhead seal I have also ordered 6 mtr of windscreen seal glazing strip to go under the ally strips (78159) when they go back in, and I already have a can of Dum Dum and some silicone for infill around the glass.

SOFTTOP/TILT
The final odd bits I need are also on order and will be here by the end of the week too. The channel to fit above the drivers door was the biggy at £40+VAT+P&P from Trakkers/Exmoor Trim but EBay only turned up scruffy pairs at the same price - and I only need one. the only outstanding items will be the four bars to go between each hoop. I will have to keep my eye out at Sodbury/Newbury et al?

So once the screen is done the whole lot can be bolted on and tightened up!

06 August 2010

1st August - Tilt on + tub & doors painted + windy stripped

In an attempt to clear a lot of the LR related debris from the garden/garage anything that can be cleaned up and bolted back on - is! I can then come back to the fuel valve, brakes etc. later. It needs to be cleared soon as we plan to put the house on the market. Buyers might be OK with walking around a complete 109 but the same vehicle in bits is a bit off-putting?

PAINT
Final coat went on without any hitches but with the sun at a certain angle you can see the roller lines. It's a military finsh after all and still better than a squaddie with a brush? Pic somewhere down the bottom of this blog post.

WINDSCREEN
The original S2/SA screen came with the 109 and still had the mounting holes for the two seperate screen mounted wipers and also screen washer jets - but the internal hose stubs had broken off in the past so were now U/S. The wiper holes had been filled with grommets and would stay that way but the washers had already been reloacted to the top of the bulkhead by me during it's rebuild so would be staying there.

At some time the galv frame had been painted inside and out with DGB and later with current military 'NATO green'. I wanted all this off and return it back to galv with a patina of age...so it all had to come off. Using Nitromors/scraping/wire wheel/several hours evetually all the paint came away. See the next post for a pic of it in a stripped state.

Now to strip out the glass and replace. Back in Feb/March the Series 2 club did a group buy of heated windscreen panels and this looked a sensible move as the warm air heaters are never 'warm', and there isn't much 'air' either. So I bought one piece of heated glass for the drivers side and a new section of std laminated glass to fit the passengers side. The passenger can just look at the condensation and frost?

SOFTTOP/TILT
When I bought the 109 it came fitted with a truck cab and an assortment of softtop hoops and fittings - unfortunately not a complete set (eh, Mark?) so the plan had been to fit the truck cab for now. But plans change. On Sunday Rich ('Rogue Trooper') mentioned he had one 'hoop' in the back garden if I wanted it? Now I already had the center and front sections and only needed the rear, hoop'wise. He had a front....which is the same as the rear but with a couple of plates welded on. So either I lop them off or leave them on :)

All Trigger needs now is one section to go above the drivers door; horseshoe clamps for the bottom of the hoops to fasten to the capping; square plates for the sharks tooth windscreen rail to the bit's o'er the door and the four tubes going between each hoop. Only one is importatnt and cannot be worked around which is the bit over the drivers door. So I will either buy new from Exmoor Trim (etc.) or scrounge from someones odd bits box. Anyone reading this have any of the above and wish to 'donate'? ;)

Before I decide whether to go for the softtop I needed to know whether the canvas is in fact, good. It looked tidy when I was given it but -

a) I never unfolded it to check

b) It has been sitting on top of a cupboard in my mouse infested front garage for 18 months

Lou and I dragged it out., unfolded it we found that other than a few stains from damp it is all good. We have also located a specialist in Westbury that washes and reproofs LR softtops/horse blankets etc. So if the price is good we will get the tilt cleaned at the same time as a bunch of horse rugs.

For now the hoops and canvas have been fitted. It makes it a bit easier to keep the rain off - makes a nice tent too.


We temporarily fitted the front screen to support the hood (travelling for the week) I then noticed that the lower rail hits/lays on both the windscreen wash nozzles and the wiper shafts. Not good. I need to get the windscreen bottom seal and check out this issue once that is fitted. After all the wiper shafts are in the same position relative to the screen now as they were when I received the 109...and they worked then? 


30 July 2010

30th July - Started paint and wheel well finished

After the last post and moving the 109 turned around this now enabled easier access to the rear end  for painting (bonnet/wings/cab to follow when I get to them). BUt, before that could be done a few other tasks had to be completed....

CAVITY WAX
In the middle of the week the 'new to me' compressor arrived which means I can now inject the Dinitrol 3125 into the bulkhead; chassis outriggers; rear x-mem; door bottoms. Out of the three 1 litre cartridges I had bought I only used one. That was a struggle but reading that this stuff goes a lot further than Waxoyl maybe that is enough? After all one 5 litre cart of Waxoyl is enough for a whole chassis - and I am only doing the x-mem etc. as the chassis is galv'd already?

SPARE WHEEL WELL
I have had this sitting around for a while ('Rogue Trooper' donation - cheers Rich) I decided to fit this in the rear tub on the passenger side. After all a bonnet mounted 750 tyre makes lifting the hood a PITA - plus getting it off can do you an injury. So the rear tub location it is.

The well and wheel securing bracket came off a 88" and were originally mounted behind the bulkhead on the SWB - but the same parts fit almost spot on at the side of the tub in the 109. So with a bit of fettlin' they went in and the spare is now enscounced in here.

ANTENNA MOUNTS
The two rear mounting points for the antenna brackets needed a bit of tidying but all the reinforcing/strengthening brackets had already been painted with POR15 sometime in the past, so only needed a top coat and could then be riveted in place.

Once all this was done all bare parts could be etch primed after rubbing it all back with some 80 grade paper on the rotary sander.

Ideally I would fit the 'correct for year' Larkspur mounts but they either cost an arm and a lower limb or are unobtainable.....so I will fit the pair of 'Clansman' bases I have to hand.

PAINT
Once all the items above had been ticked off and the primer left for 4-5 hours (warm weather anyway) I could thin some Containergard, grab a brush and a mini roller and tackle the tub and sills (the latter were painted off the vehicle).

So in the pic below we have one coat on there, but it looks tidy so far. Weather permitting I will get a final coat on tomorrow and it can then be left to harden for a few days.

After one coat.....


Next task is to finish the paintwork (as above) then get the fuel return selector/tap seal replaced - I still haven't done that after over a month of talking about it. Mmmmm

27 July 2010

24th July - tailgate on and turn the 109 around

Have a week off so I can get a few things done on the 109.

TUB
Tailgate now on and treated to a coat of paint along with the backend of the tub. All sockets fitted too, so it all looks complete from the ar5e end? 3 hours with the wacky wheel saw all the tub capping stripped of paint and lightly polished. This is not going to be painted.


DOORS
Cut out the rotten bottom sections of each door (see pic) and welded in some pre-made sections of good stuff. The broken lock surround was repaired last week. All the steel frame was then treated to a coat of hammerite anti-rust primer then two coats of Paddocks enamel. Also drilled a couple of holes at either end of the bottom section so water can get out and I can get a load of Dinitrol in (compressor arrives next week so I can get Dinitrol crazy!)


Doors hung on both sides and it needed a bit of tweaking on the bulkhead stay to get them to line up after a fashion. Still cannot get the passenger side one to go level with the top of the capping. It's about 1/8" high.

16 July 2010

10th July - Trigger moves again....and steers

As promised Trigger's steering was completed on Saturday afternoon which meant he could be driven out of the drive without the need for 'manual' steering (i.e. bloke on each front wheel). Once out we could do a pick-up of all the past 18 months 'droppages' while stripping/assembling the 109 (plus the dessicated cat droppings).

Here we go driving him back into the drive. Smokes nicely with a blip of throttle. This should stop once it gets a bit more use.


Sunday the tailgate came off to be cleaned up/primed and external surfaces painted. Left in the garage for the rest of the week to harden off whilst I spend most evenings revising for my IET 17th Edition Wiring Regulations assessment (BS7671).

Next weekend I plan to repair the bottom of both doors and fit the newly repainted rear tailgate and items such as the No. plate etc......after the rear end is treated to a fresh coat of Containergard.

08 July 2010

6th July - steering

STEERING BOX etc.
Box is now in and spaced off the bulkhead to suit the door clearance. Yep, one door is also on!

In the end I will live with a bit of roughness from the box as the inner shaft and recipricating ball race were not replaced. Maybe I will find a better one or an alternative in the future and do it but for now this one is far better than it was and works well - even if it is a bit coarse?

Re-assembly looked a nightmare if I tried to follow the green bible. So I did it my way and it went together quite easily. Packed all the bearings with Lithium grease and filled with GL4/5 once the box was on and torqued up.

The rest of the steering linkage will have to wait until I re-route the oil cooler pipes to free space for the relay linkage. That could happen by this coming weekend and if that's done I can drive the 109 around in the yard!

SEAT BOX/BATTERY TRAY
The S3 military battery tray has now been cleaned up/enameled and fitted in the now repainted and modded seat box. I had to fettle the center seat area to accomodate the battery tray.

I had also planned to install the LR Disco battery I was occassionally using to start the 109 - but it was too tall. The alternative was a spare Bosch S4 I had around, and that fits in snug plus there is space behind for an additional batt for future auxiliary supplies. For now the Bosch will sit there on it's lonesome.


Lid now fitted with the sprung clips and cable routed.


DOORS
To set the bulkhead position more accurately when setting the steering box position I had to fit one door. After all this would show up the gap size; how parallel they were; and if everything actually fitted.

Until now the doors have been behind the woodpile for the past year. Dusting them down and giving them the once over I found both will need the bottom section of the steel frame replacing due to rust. Not a big issue. Also the passenger side lock assy mounting has cracked. Welding needed meethinks?


DOOR SILLS
On checking the door sill alignment I found a few problems due to damaged door seal rubbers pushing out the aluminium lower panel/valance. These have been stripped off and new rubbers will have to be fitted.

Next stage......
  • Door sills and valances fitted and aligned
  • Repair both doors
  • Re-route oil cooler pipework
  • Complete steering linkage

23 June 2010

23rd June - Steering box again......

While I try to locate parts/part No.s for some of the steering box parts I took another look at the main cast housing and in particular the outlet shaft seal.

On initial inspection it appeared that it was some form of lip seal pressed into the casting later it was found to be just an O-ring (271013) which can be easily removed and swapped out.


As an aside the 'washer' pressed in above the seal (271014) is NLA. Not that I can see anyone needing one? To remove the washer (and allow a route out/in for the bush below) I pulled out the O-ring the inserted large screwdriver in the O-ring groove and twisted hard. Washer then pops out and leaves enough material to peen over and hold the washer after.

The oil-tite bush was then removed to allow a new one to be tapped into place. There was nothing really wrong with the old one (no play at all) but I had already bought a new genuine one so.... method used was to drive a screwdriver down the side of the bush alongside the vetical split in the bush. The bush would then fold in and can then be removed. The slighty damaged surface was then tidied up with some wet-n-dry.

My problem now is the shaft won't fit through the bush (why do I try and 'fix' something that wasn't 'broken' in the first place?). From comments on the S2 forum the thought is that the bush has to be 'reamed to suit' after install! This does not feature in the 'Green Bible'.  So I may now end up using the scrap steering box housing who's bush is also fine ;)

22 June 2010

20th June - Made a start on rebuilding the steering box

Well the box is now in pieces and I can now look at the state of the internals - which initially looked remarkably good for their age (whatever that may be?).

This is a 2A steering assembly when compared to the S3 one I had for spares (none of that one could be used so went in the scrap bin) without a steering lock etc. Internally the issues are pitting on one bearing bearing track (Part No. 271384); more on the inner shaft recip bearing screw end and the recirculating ball bearing assy.

Pics of the damage below.


The bearing track is an off the shelf £7 bit and most of bearings are good. The damaged ones can be replaced with good ones I salvaged out of the S3 box. The issue the pitting on the screw end of the inner shaft and the recirculating ball unit. The inner shaft is ava at £80 but I cannot source recirc unit - or at least I haven't found a part No. or source -yet.

A further alternative would be chemi metal in the pittings and smooth it flat. After all it isn't a highly loaded component......and it worked before?

14 June 2010

OK. Not much done but I have to post something - 14 June 2010

It seems an age since my last blog post and to be honest not much has been done to Trigger. Since March I have been working away 5 days a week and the weekends have been mainly taken up with house redec so we can sell and move on.


FUEL SYSTEM
The military fuel changeover valve that was donated by Twizzle has now installed for the injector return - but I now need to remove it again. The cork gasket had dried up and is leaking dieso. That'll teach me for trying to cut corners with the cheap price of the part? Also Minivin donated a spare 'nipple'/hose connector for the top of the fuel selector so when it comes off that can also be fitted.

Despite that the system works without fault.


REAR TUB
This is now bolted on after Minivin donated a bit of time (under duress) after being plied with a helping of Chinese food. The front was plumbed in and the front mounts on the tub drilled to suit (a previous owner had replaced the 'tabs' with new ally due to corrosion).

Last weekend was spent refitting the steel strengtheners down the inside of each tub side. These were held in with s/s screws in pref to ally rivets. Then I spent some time sanding the corroded surface of the tub back and filling the holes.

Pic below after final fill and etch primer and later LWB rim fitted.


On the rear of the tub was the original military power connector, which refused to capitulate to my previous attempts to remove it from the bent piece of ally that it had resided in. After some thought and the application of a 4" chop disk it eventually relented and is now sprayed with primer ready for later re-install. The dented panel around it's original location has also seen the visit of the No.1 LR tool and is a tad flatter than it was.


NEXT JOBS ARE...
Steering column rebuild/overhaul
Look at the front brakes again (bleed/mod)

18 April 2010

18th April - Props on and moves under it's own steam!

Yes, I know, it has been far too long since my last post or even much work on Trigger but the bathroom came first and I have been playing with the new two wheeled toy (Triumph Scrambler) so 109 came a sad third.

But some minor progress has now been made.

BRAKES
Using the Easi-bleed I pressurized the system and bled as much air as I could from the new pipework with what fluid I had to hand. Rear seemed easy but of course the usual front end dual piston problems prevailed, I need to 'attack' that again once I have some more DOT4. Currently I need to pump twice to get any feeling of resistance on the pedal. But they do work.

PROPS
New UJ's arrived for the front so that was rebuilt/fitted.

As for the rear the 'original' has been transferred to the scrap heap. On all yokes at least one bearing cap was spinning so the best thing was to weight it in. A replacement Series 2 one was sourced via 'the Bay' then cleaned up and treated to a pair of Hardy-Spicer/GKN's and a new gailter. Refitted and job done!

FUEL SYSTEM
We recently sold our waste veg powered 4x4 before that went I removed the Biotuning heat exchanger. This has now been fitted on Trigger to pre-heat the fuel (dieso or WVO) before it passes through the fuel filter.

Needs some fine tuning on the cooling pipework so the Smith heater works but the parts are on order (BioTuning) and will be easily fixed.


Holes are also now drilled to accomodate the fuel changeover tap for the pump return below the main supply changeover. All I need to fit that is one screw on nipple for the flexi pipework......mmm...beg maybe? It's the same as the ones on all Series fuel tanks after all?

The step this weekend came after fitting the props etc. There was no reason why it could no longer move and stop (after a fashion with badly bled brakes) as long as I didn't need to steer (box to be rebuilt). So why not give it a go?

Fired him up and tried the clutch. Nice smooth action (new AP after all?) and snick the gear into reverse. Also good. Bring up the clutch and....hey we're moving backwards (for 12") then dab the brake pedal and dip the clutch. So far so good. So the into 1st and...12" forwards and stop. Yabba, dabba dooo?  ;)

Now the handbrake is connected to the rear diff the can blocks can be removed from around the wheels too.

Next move is to try to get the brakes bled again then finish the fuel return system. Parts for the steering box rebuild are also sitting in a box waiting for time...etc.

23 February 2010

24th Feb 2010 - Brakes almost 99% there.....

BRAKES
A few weeks delay since the last post but now the brakes are finished bar bleeding the system. Shuttle safety valve relocated to the inside of the offside chassis rail alongside the gearbox.

Twizzle dropped by with his brake tool kit so between the two of us (while I was getting Twizzles 'new' homebrew wood stove finished for my garage - it was cold and Twizzle needed 'heat') we almost finished it in the afternoon. Though last weekend I did have to beg an odd length of Cu/Ni pipe for section from Rob 'Minivin'. Also replaced the clutch pipe with a new run - shame not to?

The Mk1 'Twizzle' wood stove on it's first test run
 So that just leaves bleeding. But as we ran out of time and light on Sunday this will be delayed for a while.


PROPSHAFTS
Now we have a heated garage (see above) I can get on with a few 'indoor' jobs during the evenings. The first being a strip-down and rebuild of the original propshafts.

In the case of the rear prop there was so much play at the rear end of the shaft this one is basically US. Not much use for anything accept for scrap. But I did find that as it accepted the small RTC3291 UJ's it's a early model shaft. So I either need to buy a complete new (prob S3) one or hunt for a good 109 prop rear section as the front end is 100%.

The front had no play but the bearings were dry/rusted in position and on their way out. This prop turned out to be a later large spacing yoke which takes the larger RTC3346 UJ's. So I need get some of these.

BODYWORK/REAR TUB
The strengthening bars on the underside of the tub have now been re-attached after getting a copious coat of black Waxoyl. Lou gave me a hand fitting the M6 stainless fasteners to secure them in position (stronger than rivets!). Next job is to bolt the tub down once I have pulled the rear loom through the chassis rail.

FUEL SYSTEM
I have yet to finish the return system back to the tanks (no surprise there?). But I do now have another military fuel tap. So that is going to be mounted below the existing one so I can then select the tank to return the fuel to ;)

WINDSCREEN
I had a post on the Series 2 forum letting me know that the heated windscreen has also arrived. So off to 'Boggies' on Sunday evening to pick-up mine/Twizzles and a couple of others to save them the trip to Aylesbury.

30 January 2010

30th January - Throttle pedal/turbo pipework

THROTTLE
Pedal now in and using Stu 'Twizzles's' old Disco throttle cable with a slightly modded defender pedal. Cable had to be spaced off the bulkhead with nylon spacers and required a clamping bracket to keep the whole lot secure as per Terri Anne Wakeman's mod at Exhibition LR.


TURBO PIPEWORK
The final section of silicone tube arrived so this, along with a section of 1mm thick wall stainless tube, went on to finish that side of things.

Drained around 1 litre of overfilled engine oil out then I fired it up again. Not that loud with no silencing.....until you hit the throttle ;)


BRAKES
Had a bit of an epiphany yesterday and found that if I route the braided front pipe in the alternative position on the chassis bracket it will reach the piston with some spare. Ideally I wanted to use the brackets that were kindly donated to the cause but this works.

Shuttle valve also bolted down to the offside chassis leg under the bulkhead so all that is left now is pipework and bleeding!

You can just about see them in the vid.

25 January 2010

25th January - Fuel lines tidied/oil cooler secured/temp exhaust on

FUEL SYSTEM
So we have now tidied up the fuel system pipework we mucked about with last week while searching for the source of the air in the system. Selected the aux tank after filling it with 20l of dieso, and once the engine was running it purged immediately. Superb!

Another option turned up for the fuel system return 'problem'. Rob 'Minivin' has suggested a system that he has proven before. Here the IP return is split to both tanks and then enters each tank through a std Series fuel pickup pipe which has been shortened to 1-2". As shown below.


The fuel will look for the path of least resistance so if the returns are kept the same length, then the fuel will  go to the tank with the least fuel. The upside is at least this method reduces both the tank connections required and is easier rig. But, the downside is cross contamination from each type of fuel will then occur?!

So it's better than option 2 but not as effective as the swirl pot or alternatively another military tank selector valve. The latter would be better but I am still undecided.


EXHAUST SYSTEM
Firing the system up last weekend proved how loud the unfettered 200tdi can be. So I decided to do reduce the noise for now, and until I make a firm decision on the what will be finally fitted, I made a temporary exhaust.

The front section was made from the Series petrol downpipe welded to the 300tdi type turbo 3-hole mounting ring (minor mods to clear the LH engine mount). I then cut out the kink at the end then used another modified piece of the exhaust to give an exit just in front of the rear passenger wheel. No silencer either! But marginally quieter than before.

Note we have 1/4" clearance from the front spring shackle and 1/2" under the gbx x-member. Though it might look otherwise from the pics.

It may be planned as a temporary option, but it is tidy? ;)
(Note this section of pipework is only 1/4" smaller than the Disco tube!)


Also noted that when the engine is revved I am getting a lot of grey/unburnt fuel smoke. So maybe someone has tweaked the IP in the past - very possibly?


TURBO/HOSING
So no intercooler (for now) but I needed to sort out the inlet pipework and turbo outlet. Using some 50mm OD bends and a short straight section and a bit of jury rigging (blew off on the first blip of boost) it was good to go. I also used a bit of the old Disco flexible I/C pipework which was well past it's best so another length was ordered and will be here in a few days. I may replace with a complete welded section which would offer a better cooling surface area in lieu of a formal I/C?

The grubby bit of Disco steel pipework is going in the recycling and I have a nice bit of stainless to fit in it's place ;)


If anyone is after good quality turbo hose sections check these guys out. Cheapest I could find and very good quality. Venair-Performance-Silicone-Hoses


19 January 2010

19th Jan - Fuel system?

Following on from the weekend and the IP return air problems a few ideas have come up.

  • A) From 'SimonR' on LR4x4 was the idea of fitting a 'swirl pot'. This would receive both the return fluid and the supply fluid from the tank via a LP pump. The schematic idea below ,while not exactly the same, gives a good idea how such a system would work. Cost here is the pot plus an LP pump - so say around £100?


  • B) Modify the military manual changeover/tank selector valve to dual gang. i.e. fit another 3 port valve behind it to direct the return back to the correct tank (my preferred option if doable).


  • C) A set-up as in the schematic below. No parts cost but the balance/overflow would have to be big enough to cope with the possible situation if the main tank became full (such as during extended idle). the only parts needs are the return pipework to the main tank and the balance/vent pipe between the two.

17 January 2010

17 Jan 2010 - It's a runner!

Saturday was spent fitting the front rad panel in; installing the Smiths heater; sorting the rad connections; priming the cooling system (fixing leaks); and connecting the oil cooler up. All that would leave was the fuel system to be completed and then jury rig the ignition electrics and we would be ready to go?

The lower rad connection was always meant to be the problem when connecting a Series rad to a Disco 200tdi. But using a couple of new hose sections and a right angled stainless section it all went together quite easily.


Next hurdle was the fuel filter location and means of mounting it. Some weeks ago I knocked up a simple plate to allow the fuel filter to be mounted on the blind box section part of the bulkhead. So all that was required was for sheet nuts/clinch nuts to be fitted and it would be good to fit? Well that didn't go to plan and the four mounting points are now limited to two as the nuts were screwed by the knackered tool (stripped threads) that I was lent. Not happy but the mounting is at least secure.

By the end of play Saturday it looked like this.


Well Stu 'Twizzle' dropped over Sunday and we had a game plan. Get the 109 started!

Stu tackled the fuel line routing from each tank while I connected the power and earthing then finished the injection pump pipework ....and in a bit of a rush before we lost the light we managed it. See link below. (Note no turbo pipework/or exhaust and a lot of loose stuff rattling).


In Hi res, but a 120MB file so a bit slower to download---> http://www.youtube.com/watch?v=ukBEbDrphBA

Well as can be seen in the video there was a lot of air in the pipework and after an hour or two of fiddling we located the source. Originally the intention was to feed the return supply from the injection pump back into the fuel filter. This had a two fold benefit. First we wouldn't need to feed back to the selected fuel tank (there are two so the manual fuel tank selector only has to deal with the supply) and secondly if the fuel is heated, either by an FPHE or from the body of the IP, this would assist the temp (and therefore the viscosity) of the fuel as I plan to use veg oil in some concentration, which is the main reason for retaining a two tank system.

But, the source of the air was found to be the IP return. So what to do? Either find a way to use the IP return supply without air being included or we/I have to feed the return back to the tank - but then there is the problem with having dual tanks and only a three port fuel selector? Worse case scenario is the passenger tank will be a spare which can be pumped to fill the main tank via an electric pump, but then veg oil concentration would then never be able to go past, say, 50-60% as there would be no 'pure' dino to start from. Basically it would then be a 'single tank' system.

Also, before we packed up for the night we ran the gearbox through. Props are currently off anyway and everything seemed to be running as it should :)

THROTTLE
Stu had located his 'spare' Disco throttle cable so when I get a moment that will fit straight on with only minor tweaks here and there (drill the bulkhead to suit).

12 January 2010

Brake bits, throttle, heated windows and rad assembly

With a break in the ice and snow we can move on a little?!

THROTTLE
Pedal now modified so it will allow sufficient stroke to open the injection pump fully. Now waiting for either a Disco throttle cable, or complete the one I already have half done.

RAD PANEL
Now fully painted headlight bowls and rad fitted. So the galv finish was etched/etch primed/light coat of Containergard/2xprimer filler/final 2 coats of Containergard (sanded between each coat). Hopefully nothing will get through all that?

I had a problem with the rubber seals that go between the military lamp bowls and the front of the rad panel. Old ones were, of course, knackered. The originals are no longer available (NLA) so alternatives had to be found. Initially Land Rover part No. STC3022 looked suitable but was also hard to source so in the end I bought a pair of new Wipac 7" plastic headlight bowls with seals from Paddocks (No. LGTS5400/DA3010). £6.50 per unit and even the correct Defender seals are around £13 each from LR dealers - and I can pass the plastic bowls on to someone who needs them for the £6!

Pic shows orginal seal on right and replacement fitted on left. Only mods required were to punch an additional hole for the 3rd adjuster.


Panel now assembled and resting in the lounge. Note that the colou always changes under flash conditions and in daylight BS381:224 is far darker ;)


Now I also made a decison re. the intercooler. For now it is not going to have one!

The reason being that the Disco 200tdi I/C assy will not fit comfortably in the available space in the rad panel, plus I need to move this project on and I can always come back to this later and retro fit? Options being an alternative unit from something else or build a basic custom unit from parts lying about?

FUEL SYSTEM
Both tanks bolted in and fuel lines started. Each tank will have a local disposable biodiesel grade coarse filter then through the tank selector and onto the original Disco fuel filter.

Fuel lines are made from a combination of 3/16" bio grade reinforced rubber fuel hose and clear pneumatic hose (Festo). Before I used this I placed a sample in 50:50 diesel:WVO for 3 months. No problems it seems, so I will go with this unless - something does go wrong?

I'll pick up 20 litres of diesel this week, fill one tank and prime the system up!

REVERSE GEAR SWITCH
Jeez. This switch has been sitting in my garage for a year (actually +3 years but the first one went AWOL) and a break in the hale allowed me to mod the gear selector and make up a basic plate to activate the switch.


Now to find a 'suitable' light to use as a reverse lamp?

BRAKING SYSTEM....AGAIN!
Well 'we' are nearly there.

Placed an order with Automec and another (what I thought would be the last) bunch of fittings arrived. Both the master cylinder and shuttle valve now have a full compilment of CORRECT fittings for the 3/16" brake pipe. For info in the end the M/C used 10x1mm and 12x1mm. The shuttle safety valve is 3/8" and 7/16".

The brake hose brackets to fasten either front hub arrived courtesy of 'Smokey IIA' on the Series 2 forum - now dry after 3 coats of smoothrite. But the connection from the Goodrich flexible and the hard pipe at the hub is now the final problem that needs resolving.


Full details at the link below but in summary the hose end is 3/8" male and 'meant' to fit to the hub piston? So somehow this needs the fit to the hub pipework..and be secure on the bracket?
Thread link--> http://www.series2club.co.uk/forum/index.php?topic=31958.0


HEATED WINDSCREEN!
Now I had seen a few comments on various fora(?) regarding the possible availiabilty of a heated windscreen glass to fit in the existing Series windscreen frame. But they seemed expensive and hard to obtain. Then a thread popped up on the Series 2 forum suggestion a 'group buy'!

So....thinking 'why buy both sections of heated glass when the drivers is the only one that needs vision' I have ordered a pair to be split with Twizzle. £55 per section. A bargain. Now to wait 8-10 weeks for delivery and then I need to get up to Aylesbury to collect.

Now to look into heated wing mirrors not that I am wandering off the parts of the project I should be concentrating on? ;)


Now hopefully (I am not putting a wager on it) the rad panel will be in/cooling system filled/oil cooler filled/fuel system ready to run...this weekend. So it will take very little to run the engine up in the chassis.....so ;)

Watch this space, but don't hold your breath!