31 August 2010

30th August - Hood now assembled...and more!

OK. Vast amount now bolted on and I am sorry nothing has been posted for a while but for some reason this Blogspot was not playing ball with my access ID. Bl**dy comps eh?

HOOD
I had decided to avoid arranging for the hood to be washed and reproofed due to the fear of shrinkage. Alternatively I will wash down and proof in situ. Safer that way. Ordered 2.5 litres of Fabsil tent proofer via E*ay for £20 delivered. Should be here this week. and as I am actually working from the office for the next couple of weeks I can get this done.... by chance the weather looks good too!

All the assorted tilt frame bits and bobs arrived from LR Series and Trakkers/Exmoor Trim so now the whole frame can be clamped in position once.......

WINDSCREEN
....the windscreen was in place! This turned out to be more of an problem due to setting the screen so the door gaps were good. We managed it in the end though...or at least the best it is ever going to be anyway? One piece Defender door seals fitted to try and prevent some of the inevitable drafts. The odd frame gap filled with grey/silver RTV ;)

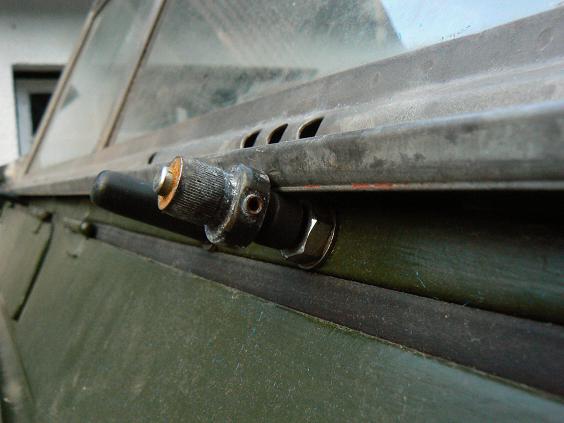
Now I mentioned in previously a few posts back that the clearance from the screen base edge to the wiper shafts was close. Well this is the same screen and early IIA bulkhead that a PO had modded to fit a later single motor wiper drive instead of the original twin seperate screen mounted motors so I thought I must be going nuts? Anyway after adjusting everything up, there is just enough clearance so everything will still work. I will post a pic when it is light enough for me to get one.

DOOR TOPS
I gave these a quick once over with the orbital sander followed by two coats of DBG enamel. Then a single coat of brushed Containergard was applied once they were fitted in position along with injected cavity wax inside the bottom rail. During the prep I also bored out the drain ports to let any moisture out after all that's where the rust seems to get deep seated? One of the tops seems a lot older than the other but both are the late IIA/S3 type with the sliding window lock and in good con.

Here we go.....


DINITROL
Well I found out why I only managed to get through one litre of cavity wax the other week. I had set the Dinitrol gun head wrong. Tweaked it this weekend to treat the door tops and now it goes great guns. After doing the doors the sun came out and the heat caused streams of melted wax to drip out of the doors and the now re-injected bulkhead :)

Only point of note. The Dinitrol gun has a pressure relief port on the top to vent excess pressure if the outlet port becomes blocked. Mmmm. I accidentally bent the outlet pipe when trying to access a difficult piece of bulkhead....then found this out - wax shot up 15ft and landed both inside and outside the hood and also sprayed around the interior! Shoot! At least those spots should avoid rust and leakage eh. Duuuugh.

INTERIOR
A few bits are now painted and re-installed. Battery is now fitted in place with the correct claps, brackets etc. and there is room for another matching batt behind the current one. So may split charge later.

Floors plates and seat box lids now cleaned up and treated to two coats of DBG and are ready to go back in. Trans tunnel cover treated likewise and is now back in place.


Next job (along with hood proofing) will now be the front brakes.

I have been trying to get these to bleed properly but have the usual 109 twin piston issues so I have decided to take the back plates off and raise the vent above the rest of the brake system. Doable. I just need to take a few things apart ;) So as I will be doing that I might as well do the job properly?

Back in the early days I replaced one piston which had failed seals and just fitted new shoes and drums. Looking at both hubs I have two 'monkey' cast (steel?) pistons on one side and one pattern alloy on the other mated with one Girling. I have decided to dump the lot and fit new 4x Girling on the front axle, plus new adjusters! Might as well?

12 August 2010

10th August - Windscreen glass fitted

WINDSCREEN
Parts have now arrived so time to build up the screen.

Parts required:-
  • 1x 150ml small pot of Dum Dum
  • Frame sealant/silicone RTV or more dum dum
  • 6x 1 metre lengths of glass glazing strip
  • Solvent and rags for cleaning
Screen frame was cleaned up last weekend so that only left dusting and wiping down the area that the dum dum is going to seal the glass.
Using a section of the old glass the dum dum was rolled to form a sausage length of 1/4" diameter suitable for each of the four sides of the frame. 'Sausage' laid at the edge of the frame so that when the glass was fitted the excess dum dum squeezes out and fills the void. Pic below shows the first pane of glass dropped in and centered in the frame - then carefully pressed down to 'squidge' the dum dum out of the frame edge.


Next the void between the edge of the glass was filled with frame sealant. You could use Dum Dum if you have enough or silicone RTV. It's your choice but I had a tube of 'natural' frame sealant to hand so used that.


Rubber glazing strip then cut to length and placed around the edge of the glazed area. It needed 6x 1 meter lengths to do the job. Trim then refitted which should hold the glass in tight if you have applied enough Dum Dum. Trim had already been degreased etc. Pic shows the center strip of rubber fitted and the completed strip above.


The same process was carried out for the drivers side (heated) glass. The only difference being the cable routings out of the base of the frame (pics below). Once the complete a craft knife was run around the front side of the screen around the edge of the glazing. The excess dum dum could then be dumped or saved. This will now be left for a few days to cure.


My solution to the cabling connection to the heated screen element was to file out a small notch at either end of the bottom clamp strip. The rubber protects it and one end can then be grounded to the frame and the more central one run through a grommet into the dash void behind the instruments.


Obviously the glass will get a good clean and buff before fitting once then sealant has had time to cure ;)

09 August 2010

8th August - Windscreen dismantled

WINDSCREEN
Well not a great deal happened this weekend due to personal committments but after the paint was removed now it was time for the glass to be removed in prep for the heated glass to be dropped in.

One item noted before the screen was removed. If you see the pic below the bottom of the screen is in contact with both the wiper shaft and washer jet. At that time no seal was fitted between the screen and bulkhead but as far as I can see once it is in there it will be worse than it is now? I have a seal on order (FAJ100020) which should get here this week so then we can see how it looks with the spare windscreen on there? There is no difference from as the 109 was when I stripped it (bar the washers) so.....


Removing the glass was straightforward with the screen supported across two tressels. None of the self tappers stuck and the aluminium sealing strips came out without any problems. After 15 mins it looked like this.


Along with the bulkhead seal I have also ordered 6 mtr of windscreen seal glazing strip to go under the ally strips (78159) when they go back in, and I already have a can of Dum Dum and some silicone for infill around the glass.

SOFTTOP/TILT
The final odd bits I need are also on order and will be here by the end of the week too. The channel to fit above the drivers door was the biggy at £40+VAT+P&P from Trakkers/Exmoor Trim but EBay only turned up scruffy pairs at the same price - and I only need one. the only outstanding items will be the four bars to go between each hoop. I will have to keep my eye out at Sodbury/Newbury et al?

So once the screen is done the whole lot can be bolted on and tightened up!

06 August 2010

1st August - Tilt on + tub & doors painted + windy stripped

In an attempt to clear a lot of the LR related debris from the garden/garage anything that can be cleaned up and bolted back on - is! I can then come back to the fuel valve, brakes etc. later. It needs to be cleared soon as we plan to put the house on the market. Buyers might be OK with walking around a complete 109 but the same vehicle in bits is a bit off-putting?

PAINT
Final coat went on without any hitches but with the sun at a certain angle you can see the roller lines. It's a military finsh after all and still better than a squaddie with a brush? Pic somewhere down the bottom of this blog post.

WINDSCREEN
The original S2/SA screen came with the 109 and still had the mounting holes for the two seperate screen mounted wipers and also screen washer jets - but the internal hose stubs had broken off in the past so were now U/S. The wiper holes had been filled with grommets and would stay that way but the washers had already been reloacted to the top of the bulkhead by me during it's rebuild so would be staying there.

At some time the galv frame had been painted inside and out with DGB and later with current military 'NATO green'. I wanted all this off and return it back to galv with a patina of age...so it all had to come off. Using Nitromors/scraping/wire wheel/several hours evetually all the paint came away. See the next post for a pic of it in a stripped state.

Now to strip out the glass and replace. Back in Feb/March the Series 2 club did a group buy of heated windscreen panels and this looked a sensible move as the warm air heaters are never 'warm', and there isn't much 'air' either. So I bought one piece of heated glass for the drivers side and a new section of std laminated glass to fit the passengers side. The passenger can just look at the condensation and frost?

SOFTTOP/TILT
When I bought the 109 it came fitted with a truck cab and an assortment of softtop hoops and fittings - unfortunately not a complete set (eh, Mark?) so the plan had been to fit the truck cab for now. But plans change. On Sunday Rich ('Rogue Trooper') mentioned he had one 'hoop' in the back garden if I wanted it? Now I already had the center and front sections and only needed the rear, hoop'wise. He had a front....which is the same as the rear but with a couple of plates welded on. So either I lop them off or leave them on :)

All Trigger needs now is one section to go above the drivers door; horseshoe clamps for the bottom of the hoops to fasten to the capping; square plates for the sharks tooth windscreen rail to the bit's o'er the door and the four tubes going between each hoop. Only one is importatnt and cannot be worked around which is the bit over the drivers door. So I will either buy new from Exmoor Trim (etc.) or scrounge from someones odd bits box. Anyone reading this have any of the above and wish to 'donate'? ;)

Before I decide whether to go for the softtop I needed to know whether the canvas is in fact, good. It looked tidy when I was given it but -

a) I never unfolded it to check

b) It has been sitting on top of a cupboard in my mouse infested front garage for 18 months

Lou and I dragged it out., unfolded it we found that other than a few stains from damp it is all good. We have also located a specialist in Westbury that washes and reproofs LR softtops/horse blankets etc. So if the price is good we will get the tilt cleaned at the same time as a bunch of horse rugs.

For now the hoops and canvas have been fitted. It makes it a bit easier to keep the rain off - makes a nice tent too.


We temporarily fitted the front screen to support the hood (travelling for the week) I then noticed that the lower rail hits/lays on both the windscreen wash nozzles and the wiper shafts. Not good. I need to get the windscreen bottom seal and check out this issue once that is fitted. After all the wiper shafts are in the same position relative to the screen now as they were when I received the 109...and they worked then?